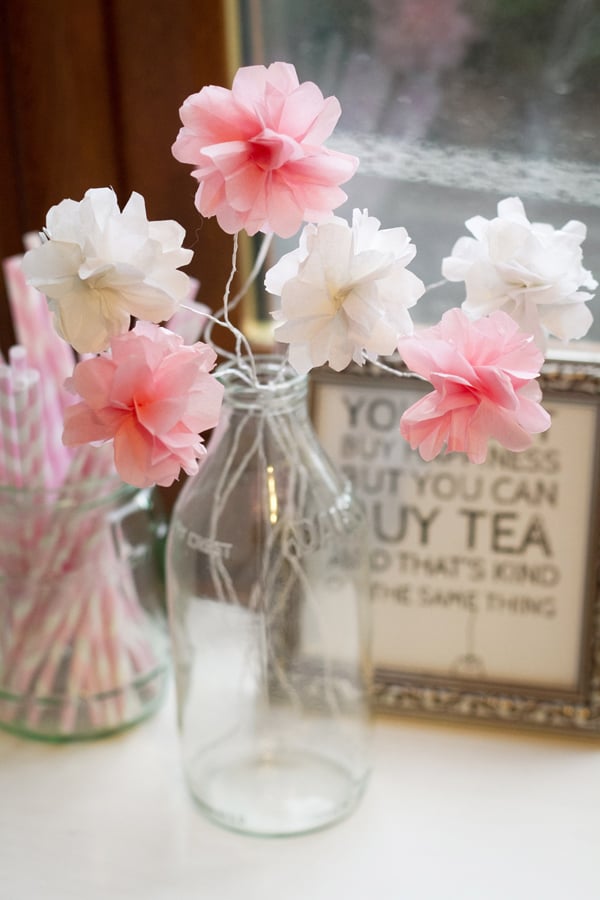
Home DIY: How to Make Mini Tissue Paper Flowers In A Vase
If you’re avid readers of Bespoke Bride you’ll know that we’ve been busing painting and decorating lately, ready to move into our new office! (eek!)
We’ve also been trying our hands at a spot of DIY and let me tell ya…we’re not half bad at making pretty little decorations to lavish around our new space! In fact…we loved these mini tissue paper flowers so much that we wanted to share with you how to do it!
Scissors at the ready!
Why a DIY Mini Tissue Paper Flowers in a Vase is a Great Idea!
A DIY Mini Tissue Paper Flowers in a Vase project is a wonderful idea for several reasons. Firstly, it allows for creative expression and customization. By making your own tissue paper flowers, you have the freedom to choose the colors, shapes, and sizes that best suit your taste and decor. You can match them to a specific theme or color scheme, ensuring that they perfectly complement the ambiance you desire.
Secondly, DIY tissue paper flowers are a cost-effective alternative to real flowers. Fresh flowers can be expensive, especially if you’re looking for a large quantity or rare varieties. With tissue paper flowers, you can create a beautiful arrangement at a fraction of the cost. The materials are readily available and affordable, making it a budget-friendly option for those who still want an eye-catching centerpiece.
Another benefit of creating your own tissue paper flowers is that they are long-lasting. While real flowers eventually wilt and wither, tissue paper flowers can maintain their vibrant appearance for a long time. This means you can enjoy your creation not only during the event but also as a lasting decorative piece for your home or office.
Additionally, crafting tissue paper flowers can be a fun and engaging activity for individuals or groups. It’s a project that allows you to unleash your creativity, providing a sense of accomplishment when you see the beautiful results. It’s an excellent way to spend quality time with friends, family, or even as a therapeutic solo activity.
Finally, the versatility of tissue paper flowers allows you to use them in various ways. From centerpieces at weddings, parties, or special events to home decor, they add a touch of charm and elegance to any setting. You can also give them as thoughtful handmade gifts or use them for crafting projects, such as scrapbooking or card-making.
In conclusion, creating a DIY Mini Tissue Paper Flowers in a Vase project is a fantastic idea because it allows for creative expression, is cost-effective, provides long-lasting beauty, and can be a fun and engaging activity. Whether you’re looking to add a personal touch to your event or want to enjoy the beauty of flowers without the expense and maintenance, tissue paper flowers offer a delightful solution.
You will need:
♥ Tissue paper
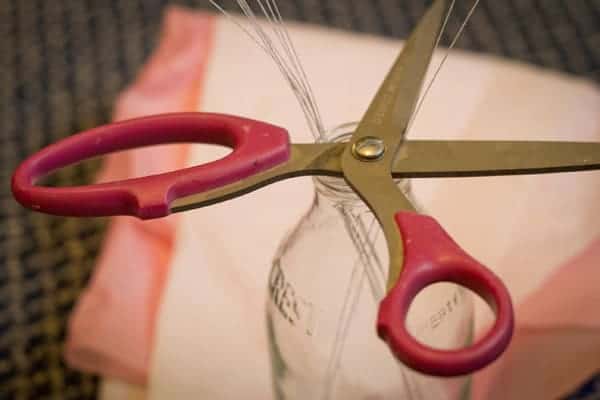
♥ Scissors
♥ Flower wire
♥ Milk bottles (or a vase of your choice!)
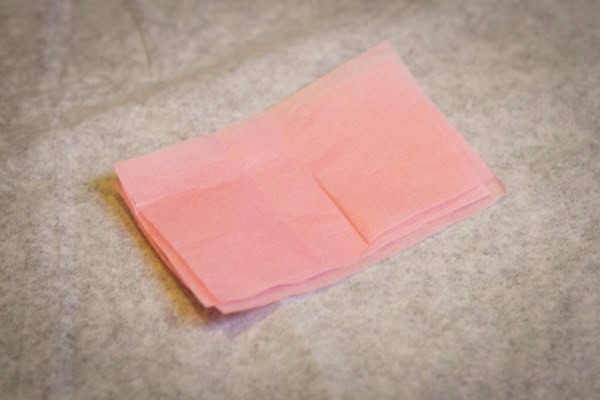
Cut out 4 rectangular pieces of tissue paper and layer them on top of one another,
you’ll need to measure them to 2 1/4 ” by 3 1/2 “.
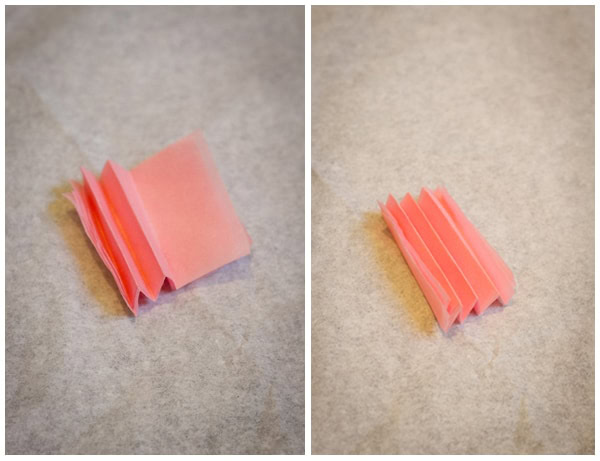
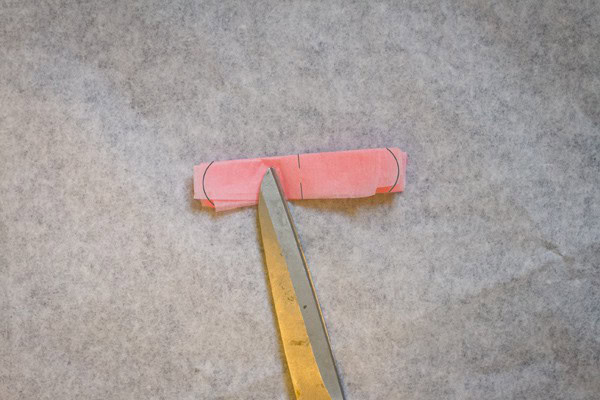
Next, fold the tissue using an accordion fold (see picture below)
Once you’ve finished folding, pinch the tissue together and turn it on it’s side. You now need to cut where the lines are. We’re going to cut round edges on ours because they tend to look more delicate, but pointed edges look pretty funky too! Make sure that you do not cut all the way through the middle of the tissue either!
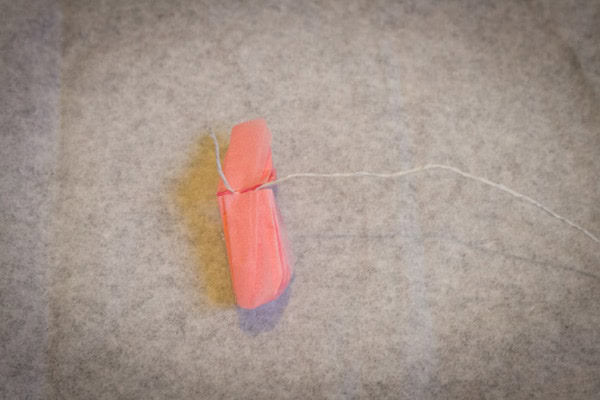
You will now need to take your flower wire (in our case we used 3 pieces and wrapped them around each other to make it stronger) and create a loop around the center of the tissue where you made the slits. Twist the wire around each other and make sure it’s secure.
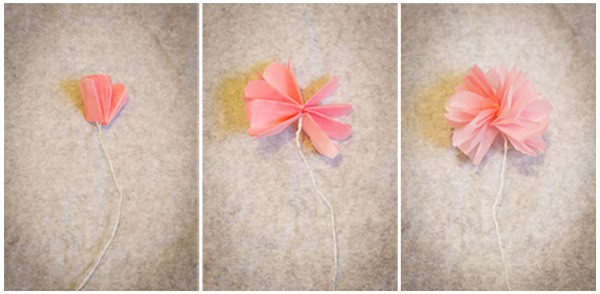
Next (the fun part!) unfold the tissue! Pull the first layer up, then gradually do the same with all of the other layers.
Now place your pretty tissue paper flower in your milk bottle (or vase!) and move onto making your next flower! We chose a colour scheme of pink and white because we felt that 2 or 3 different colours work best!
Happy DIY’ing!
Are you a DIY bride? Need help with organising all your projects? Get our brand new Printable DIY Wedding Planner & Organiser by clicking the button below:



looking nice
Thank you 🙂
xxx
How cute is this? I’d say pretty darn cute!
Nice??❣️❣️??