
FREE PRINTABLE BRIDAL SHOWER MEMORY GAME

BRIGHT AND COLOURFUL GEOMETRIC NAIL TUTORIAL
Eek! How bright and colourful do my nails look right now?! Super Bespoke Bride am I right?! I’m not going to lie to you guys though, I did not create these nail designs myself, I called in an expert instead to give you a step by step tutorial on how you can get this look! Gemma from GPom Nails & Beauty will walk you through it all!
YOU WILL NEED:
Nail varnish in 6 different colours // A thin nail brush // A top coat //
STEP 1:
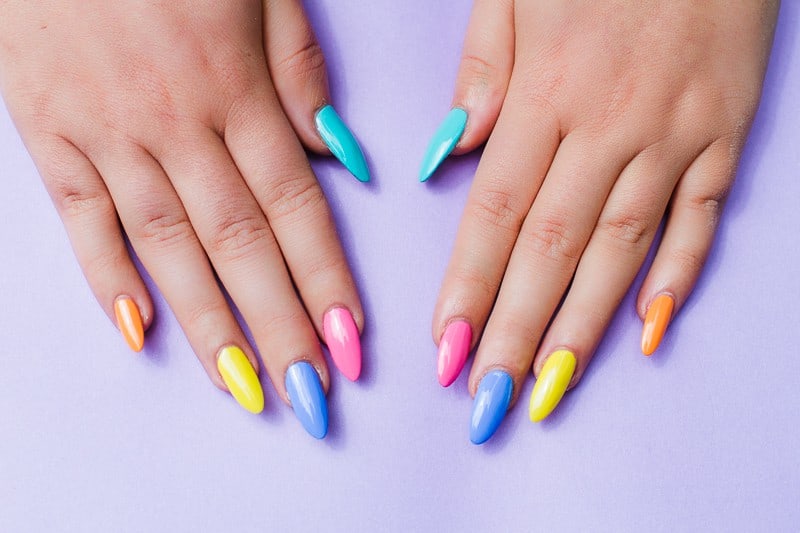
Paint all of your base colours onto your nails and allow to dry, then repeat with a second coat.
STEP 2:

Using a different colour of your nail varnish create geometric tips following the shape of your nails. We topped the green with orange, the pink with yellow, the blue with purple, the yellow with green and the orange with pink! But feel free to mix it up and use whichever colours wherever you like!
STEP 3:
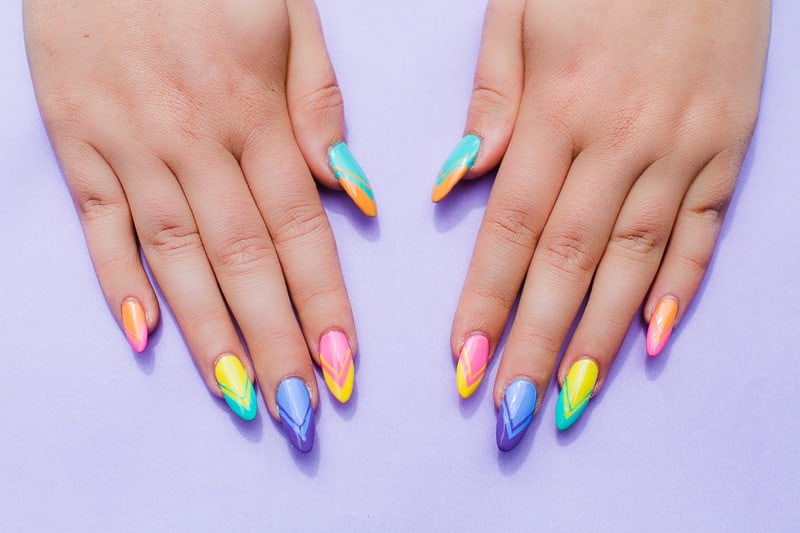
This bit can be a little tricky so try to have as much of a steady hand as possible! Tip a little bit of nail varnish onto a disposable surface, like a piece of tin foil then take your thin brush and dip it into the varnish. Next, paint a line from the edge of your nail into the centre of your nail following the previous shape you created. Then repeat on the other side.


And that’s all there is to it! I think this design is perfect for the summer and is super fun! Don’t forget to check out Gpom Nails & Beauty for more nail inspo! xx