THAT 70’S STYLE! GROOVY & COLOURFUL WEDDING INSPIRATION + A DIY GARLAND!

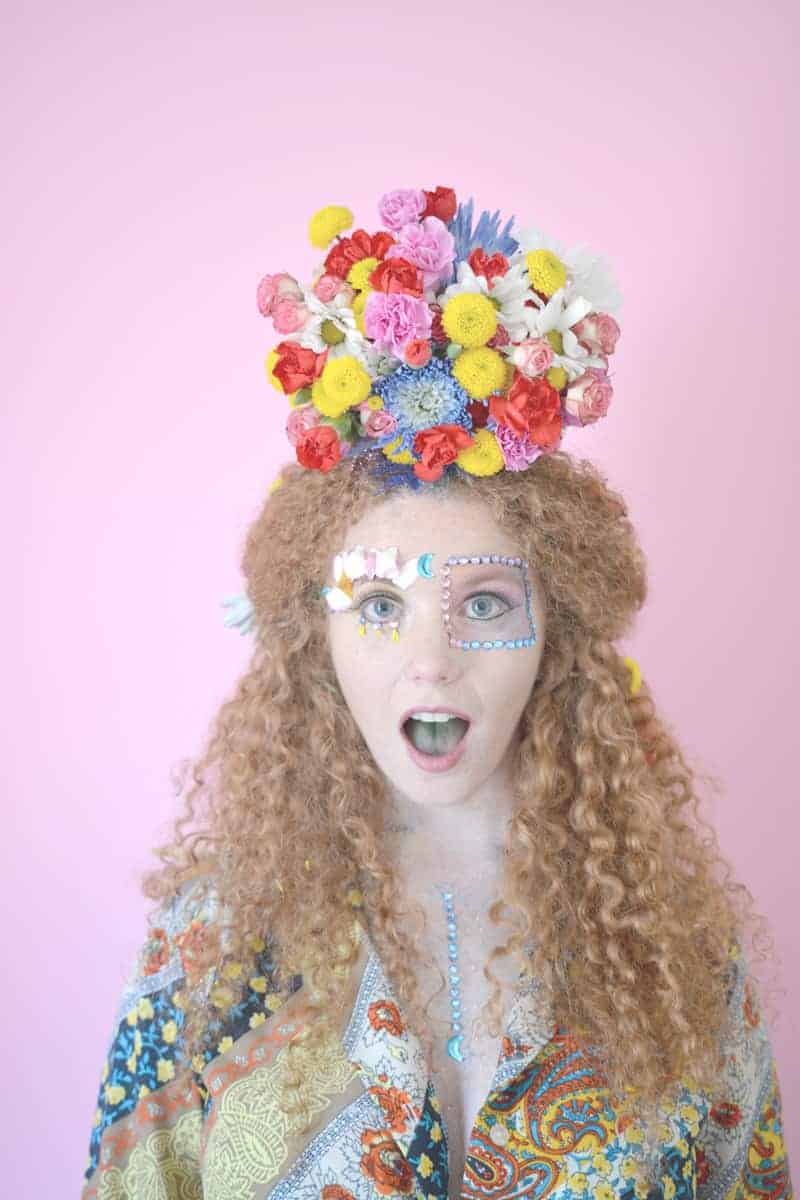
When I think of the 70s my mind automatically wanders to bright, bold patterns and an abundance of flowers as well as wild hair and groovy style! Today’s team of suppliers wanted to capture this era teamed with a much needed sugar fix! I am so obsessed with the blooms in the brides hair and just know you guys are gonna love how fun this is…


ABOUT THE SHOOT…
“We styled and photographed a 70’s Geometric Friendors Inspiration Collaboration. When choosing our theme, we decided on four keywords to guide us through the shoot: Groovy, Colorful, Geometric, and 70’s! Geometric shapes were incorporated through the chair, the makeup, and the garland. We made a garland for the background and table runner and no decade themed wedding is complete without a bar of that decades greatest candies! We researched and sought out candy invented and popular in the 70’s. We included: Lemon Heads, Nerds, Gobstoppers, Laffy Taffy, Fun Dip, Ring Pops, and Skittles. We noticed each of these candy’s packaging follows a similar aesthetic and color palette – all inspired by the groovy 70’s. This defined our color palette: Red, Blue, Yellow, Pink, and Green, with neutral colors of Black and White. For center pieces, we grabbed hippie style decade books from our studio, like the hippie Dictionary, the hippie handbook, the electric kool aid acid test, and more. We topped the stack with two dolls in love wearing colorful clothes! For her outfit, we chose a vintage patterned blouse that matched our color palette and a white skirt because we can’t get bridal out of our hearts, no matter how much groove we have. Her hair was left natural with the exception of glitter roots and flowers placed in. We used gem stickers from the Dollar Tree for her nails and makeup, and did all of the ideas we had for her makeup: petals for eye lashes, gems, geometric shapes, and colors.We love broad color palettes and grooviness and just wanted to create something couples could be inspired by and even pull off themselves because it’s so simple!”
HOW TO MAKE THE GARLAND…
There are so many things you can do with garland. So many different ways to hang garlands. You can hang them like streamers, or you can hang them traditionally, draping. You can hang them practically anywhere – as a ceremony backdrop, on fireplaces, door ways, stair cases, just draped on the wall, everywhere. You can use them as table runners, as an aisle runner for your ceremony (hey, why not, right?), as streamer door dividers in your venue with multiple rooms. Let your imagination run wild, my wedding crafters. Wild.
The magic is held in the design decisions. What shapes will you have? What type of paper – solids or patterned? Will you do all the shapes on one string or just one shape on each string? Sometimes these decisions are made in the beginning. Sometimes you don’t know until you get started.
Supplies: You will need paper, scissors, double sided tape, and a type of string.
1: First you need to determine what shapes you want. We decided to keep it simple (we are not afraid to admit that our cutting skills are not that stellar) and stick with triangles, squares, and rectangles. And hey, if you turn your square sideways you have a diamond. Right? We decided to keep our triangles and quadrilaterals on separate garland strands – triangles on one string, quadrilaterals on the next, instead of mixing the two shapes on one string.
Begin by cutting your pages into the shapes of your choice. You’ll need to cut two pages of every shape you cut – a front and a back for the shape. You’ll be taping the string in between them.
2: Now that you have all of your shapes, cut your string to whatever length you would like it to be. Ours were an average of 6-8 ft long each. Tie loop knots on the ends of each string so you will have a loop to hang it by.
This is where the taping comes in. You may be thinking “tape?”, and yes, double sided sticky tape is the way to go. As you would with any other adhesive, properly cover your bases.
3: Take your two pieces of paper for your one shape (you can even mix and match them!!) and put the double sided sticky tape on one of the pieces. Then, take the taped shape and corner it up in the center of the string and place the other piece of the shape on top. It wont be perfect, so you’ll have to cut off the white edges.
4: For your next shape, line it up perfectly with the first – almost overlapping, as you will be cutting off excess. Do this again and again on your entire string and wallah!
SUPER SUPPLIERS:
Concept: Friendors Consultancy // Photography: Six Hearts Photography from Far Out Galaxy // HMUA: Rebekah Nelson //Model: Raven Cheyenne Hill // Garland: Robot Booth from FOG // Furniture: IKEA USA // Dolls: The Cinnamon Bears // Skirt: Forever 21 // Top: Vintage // Headpiece: Crown and Glory //


I love your post, the colors are beautiful! I’m a designer and currently working on a collection called The Butterfly Effect, made with real butterflies, I feel like you would like it!
Keep up the good work!