
Eco-Friendly Wedding DIYs: Sustainable Ideas for a Green Celebration
DIY MANDALA PLACE SETTINGS THAT BRING THE FESTIVAL VIBES TO ANY WEDDING
 This year Glastonbury festival wasn’t on and I seriously missed it, we honestly had the hottest summer here in the UK that I can ever remember and I can just imagine how epic it would have been to have sat watching the bands in a field (cider in hand!) soaking up the sun! Fingers crossed for next year right?! For now I’m channeling all of those festival vibes into today’s DIY with these ombré mandala place settings! I love how cool, colourful and hippie looking they turned out! If you want to make your own, here’s how…
YOU WILL NEED:
- A Cricut Machine
- A Gold Cricut Pen
- Plain White Card
- Spray paint in the colours of your choice (We used Rustoleum in yellow, blue and pink) Or you can use a small roller and normal craft paint if you want a super clean finish.
- A Mandala stencil (this one was from Stencil Revolution and they have TONS more to choose from on there!)
- Masking tape
*If you don’t have a Cricut machine then you could still do this project with the stencil, you would just need to ask your stationery/calligrapher to write everyone’s names on the cards instead of getting the machine to write them for you. If you’re doing this, go ahead a skip step 4!
 STEP 1:
Open up the Cricut Design space and start a new proiect. The first thing we’re going to do is create the rectangle shapes, so hit the square tool, unlock it and then size it to however big or small you want your name cards to be. I sized these ones 7.5″ x 2.5″.
STEP 2:
Next it’s time to add the text, I simply typed the names that I wanted the machine to write and then chose a font that I liked and set the layer to ‘write’. You’re going to need to attach the box and the text together too so that they remain in the same place!
STEP 3:
Load your pen and card into the machine and watch it do it’s magic!
 STEP 4:
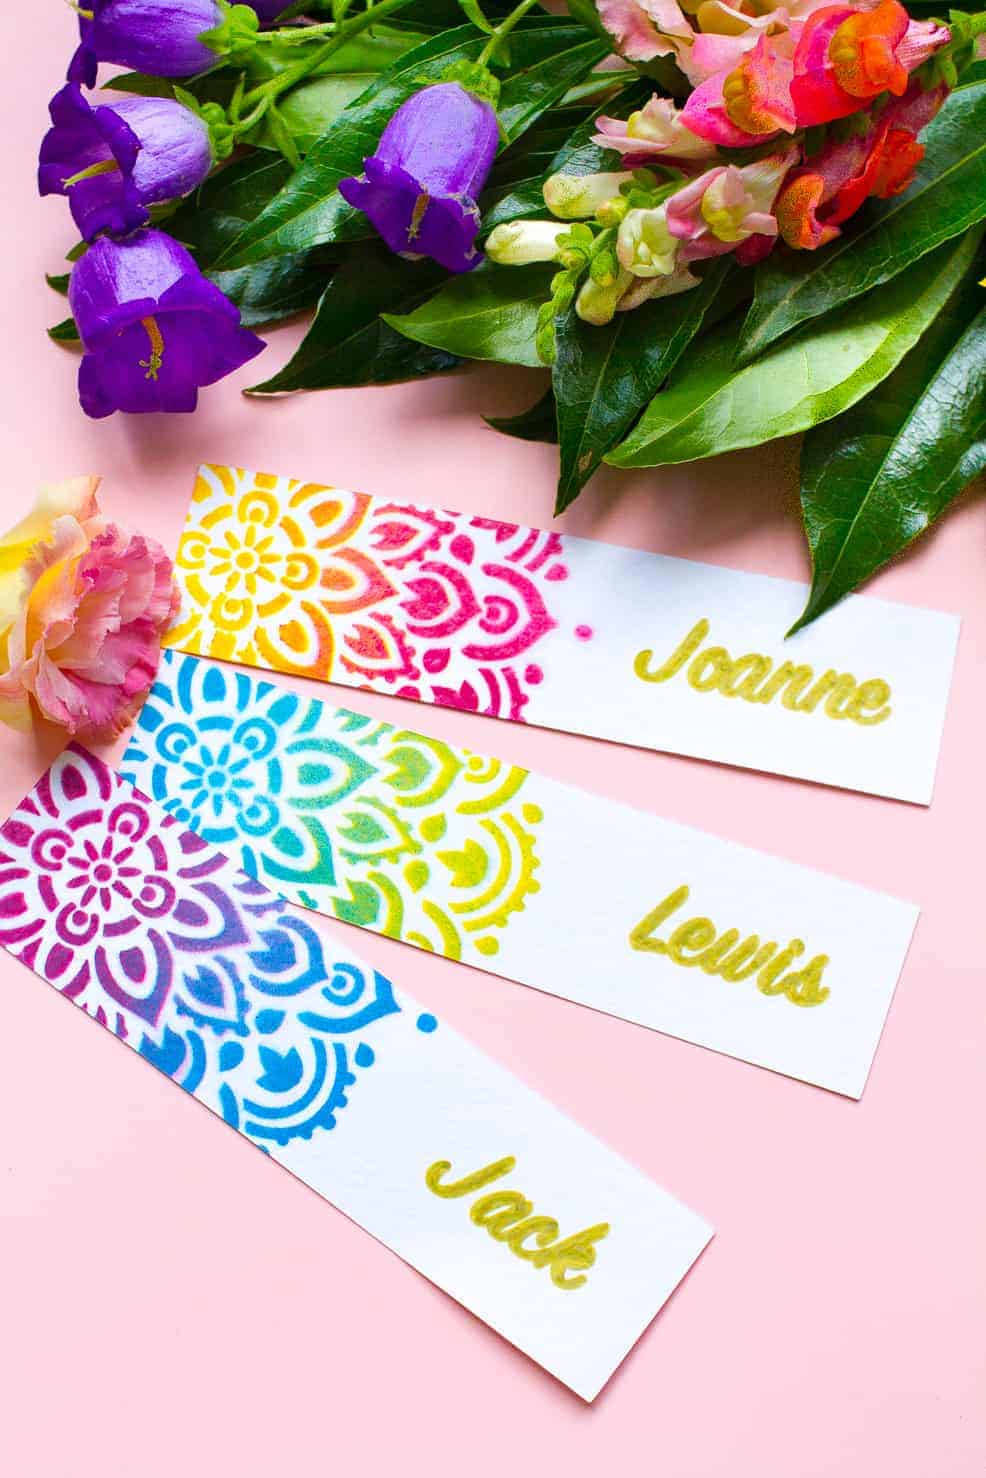
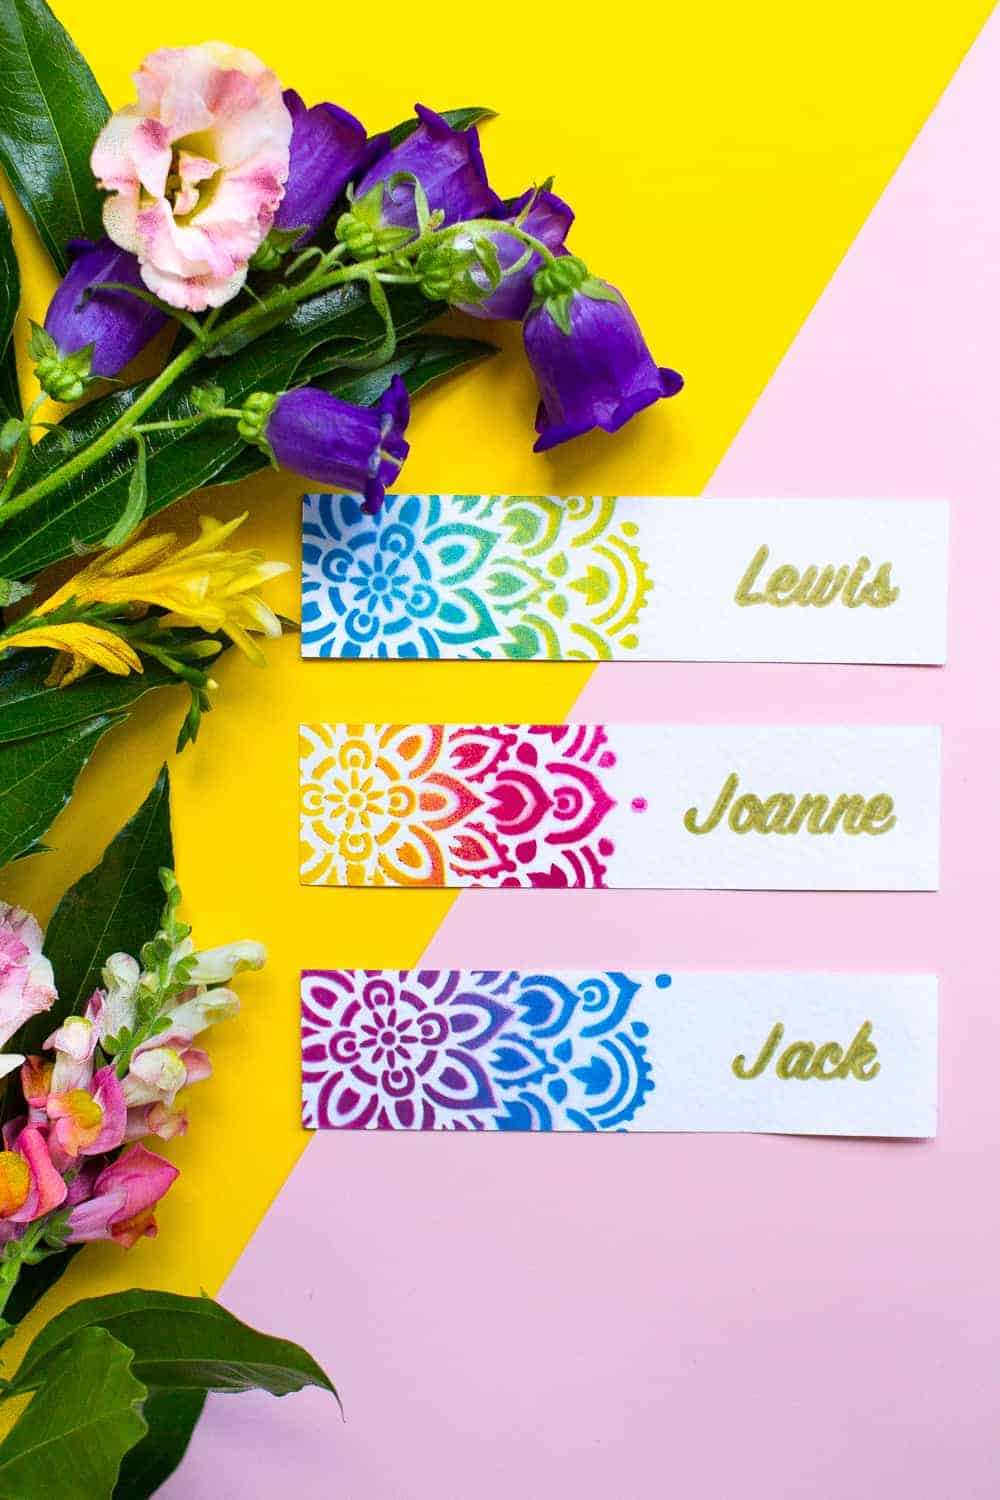
Once you have all of your name cards cut out and the names written on them, it’s time to get painting those beautiful mandalas! I love ombre so I decided to create an ombre colour palette using three different colours! I alternated between spraying pink and yellow together, blue and pink together and pink and yellow. To do this you’re going to want to use your masking tape to secure the stencil to your place card then spray paint away, have fun with it! It’s amazing seeing the patterns once you pull the stencil away!
STEP 5:
Repeat on all of your cards and leave to dry.

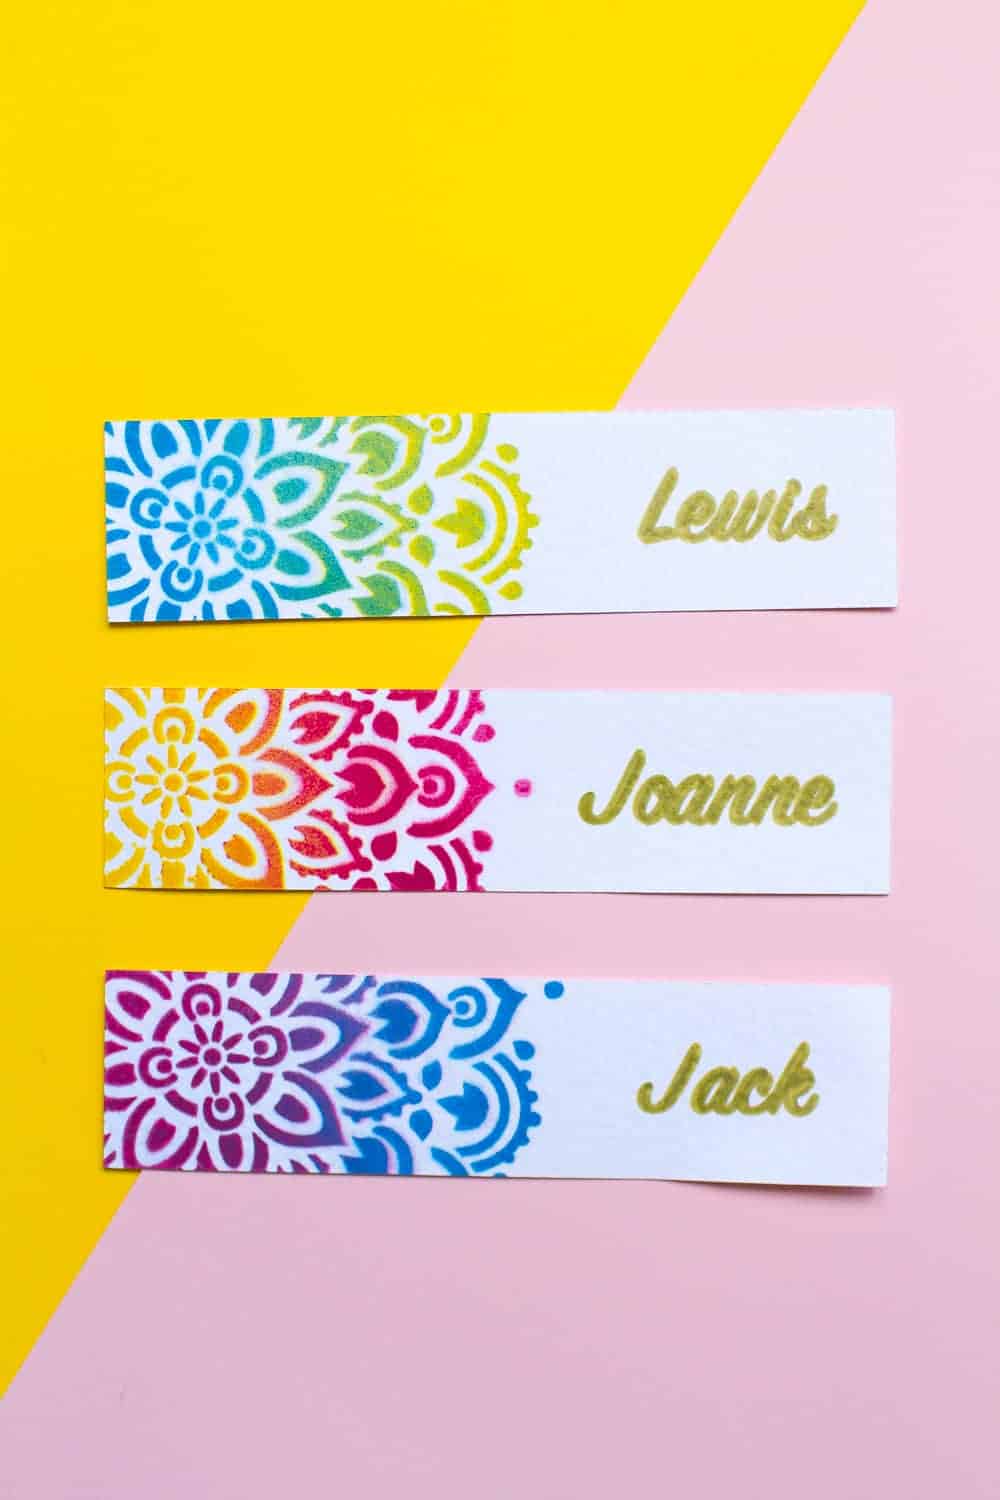
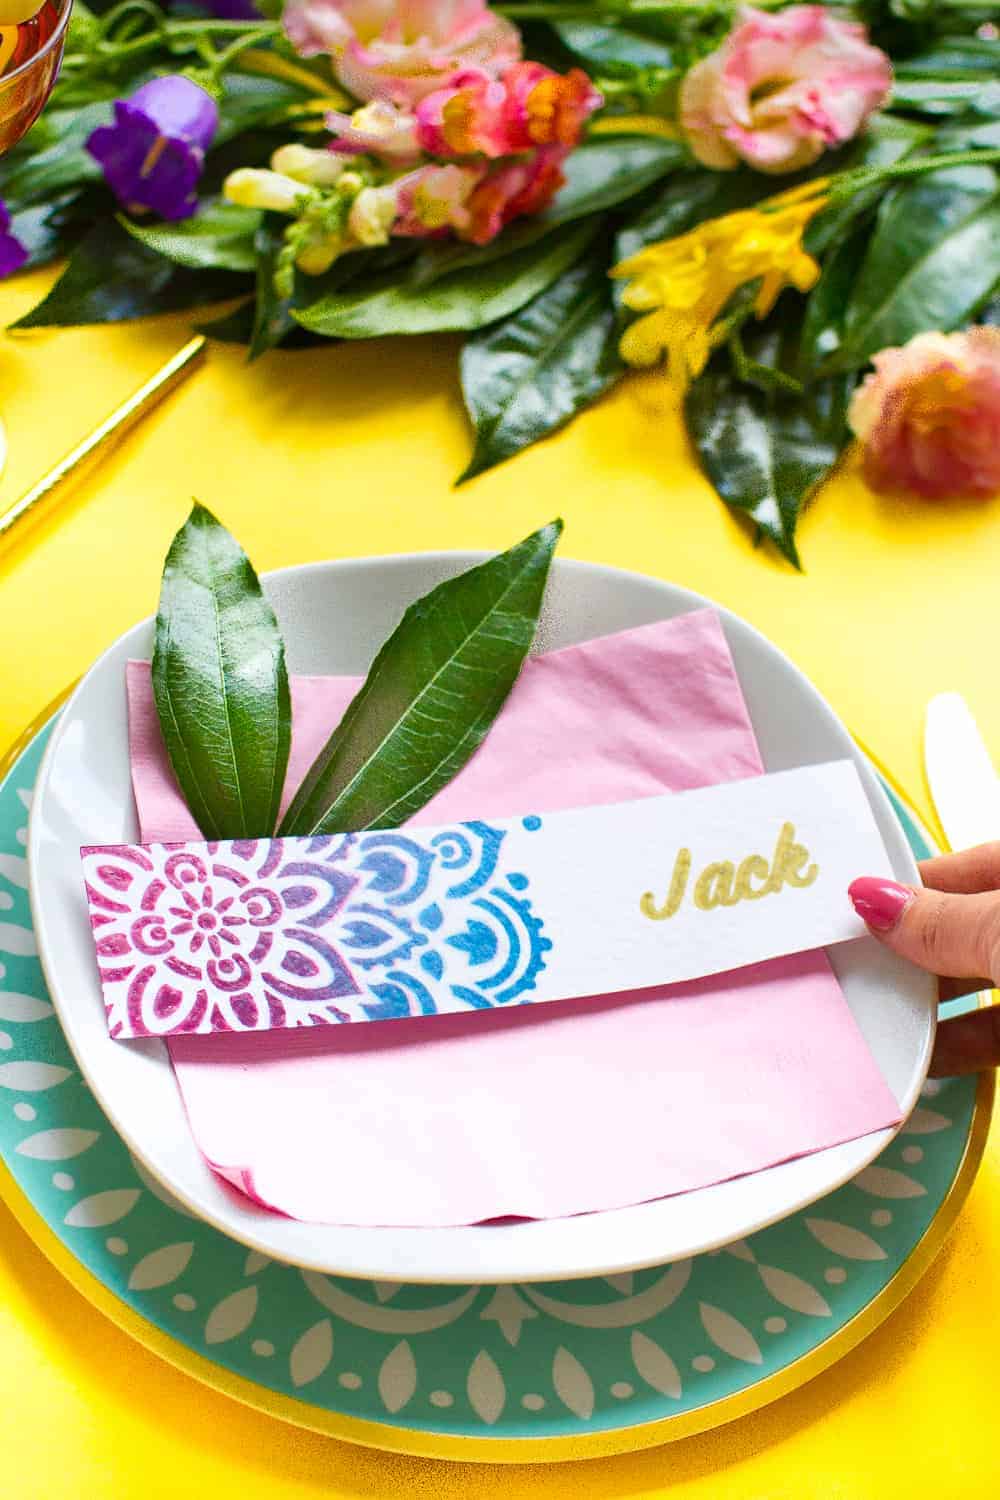 Job done! You can guarantee these place card settings are sure to make a statement on the table! Don’t forget if you want to see more DIYs and keep up to date with us then you can follow us on instagram here! xx